Congratulations to the newly elected members of the Squeak Oversight Board for 2025. We are grateful to everyone who ran and offered their time in support of the community – it truly takes everyone’s contributions to help Squeak succeed. A big thank you as well to Patrick for once again running the election and handling the process so smoothly. Whether new to the board or continuing your service, we appreciate your dedication and look forward to a productive and exciting year ahead.
Below is Patrick’s official announcement to the Squeak Developers mailing list:
Hi Everyone,
I’m very pleased to announce your Squeak Oversight Board for 2025.
They are:
Marcel Taeumel
Vanessa Freudenberg
Eliot Miranda
Tim Rowledge
David T. Lewis
Christoph Thiede
Rachel Crowther
I would like to thank everyone that served on the board in the term of 2024. Thank you for your contributions to Squeak!
Thank you to everyone that ran this year and for everyone that voted. We are looking forward to a great year in the Squeak community!
Please help me to welcome and congratulate your new board for 2025!!
Dr. Nicola Mingotti has created a highly useful video tutorial, “The Squeak Smalltalk Help System”, where he demonstrates how to use and implement the Squeak Help System in your projects. In the video, Dr. Mingotti walks you through a step-by-step guide on creating documentation for your code, providing valuable insights into integrating the help system into your workflow. You can check out his video here.
Additionally, Dr. Mingotti offers supporting materials in his Swiki article here, which includes code snippets and further comments to aid your understanding.
Overview of the Squeak Help System
One of the many great features of Squeak is its rich set of help documentation. The default Squeak image comes with valuable documentation that covers topics such as: How to Use Squeak, How to Contribute to Squeak, Tutorials, The Terse Guide to Squeak, and Using WebClient and WebServer. This documentation is easily searchable, making it a highly useful resource for your projects.
Help System vs. Code Comments
It is important to note that the Squeak Help System is not intended to replace code comments. Squeak/Smalltalk provides excellent functionality for adding comments directly in your code, and these should remain the primary way to document code behavior, logic, and functionality. The Help System is designed for documentation outside the scope of code comments, such as explaining overall project goals, providing tutorials, or offering guidance on using tools and features in your project.
Features of the Help System
The help documentation system offers a variety of features, including text styling (bold, italics, strikethrough, underline), code formatting and syntax highlighting, and URLs, to name a few.
Additionally, you can add images to your documentation. This feature is currently available in the Trunk image, but you can implement it in other images as well by using its code as a reference. For the 6.0 image, you can perform a fileout of the SqueakHelpTextImage class from the Trunk image and then filein it into the 6.0 image. Alternatively, you can create your own code to implement this functionality! Thanks to Christoph Thiede for providing guidance on how he implemented this feature. You can find his post here.
How to Insert an Image into Your Help Page
Open a Workspace window.
In the Workspace, perform a “do it” on the following code: Clipboard clipboardText: Character startOfHeader asString.
In your help page window, move your cursor to the location where you want to insert the image. Paste the clipboard contents (Ctrl+v or Cmd+v on Mac). At this point, you won’t see anything yet.
(Optional) Skip this step if you prefer typing the code manually. Copy the following code, replacing /path/to/file/image.png with the actual path and filename of your image: SqueakHelpTextImage forForm: (ImageReadWriter formFromFileNamed: '/path/to/file/image.png')
Return to your help page window and move your cursor to the same location where you want to insert the image. PressAlt+5 (or Cmd+5 on Mac), then select “Custom attribute…” from the bottom of the list.
When the Input Requested box appears, paste the image code from Step 4 (or manually type it in) into the field labeled “Enter expression for text attribute:”. You should now see a shaded outline where the image will appear.
Save your changes by pressing Ctrl+s (or Cmd+s on Mac).
Your image is now successfully inserted into your help document!
Conclusion
A big thank you to Dr. Nicola Mingotti for his helpful video tutorial on using the Squeak Help System, which offers a step-by-step guide for integrating the help system into your workflow. His Swiki article is also a helpful resource with code snippets and additional comments. Be sure to check out his materials to further enhance your understanding of Squeak and the Help System!
Have a great time with Smalltalk and keep on Squeaking!
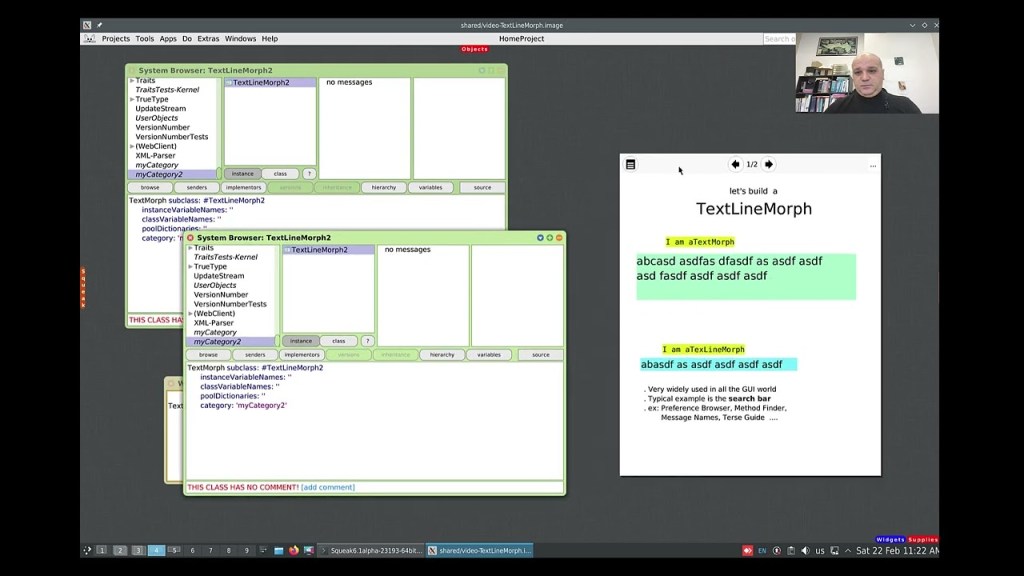
While working with Morphs can be quite easy at times, working with both text and Morphs might not always seem as straightforward. Dr. Nicola Mingotti provides a helpful video that demonstrates a commonly needed functionality in graphical interfaces, where you would typically want to accept a single line of textual data. Check out his video to see how this can be easily accomplished. You can view the video demonstration “Make a TextLineMorph in Squeak Smalltalk”here.
Have a great time with Smalltalk and keep on Squeaking!
The following announcement was made by Patrick Rein on the Squeak Developers mailing list (here). Please announce your candidacy on Squeak-dev or vote for a candidate. Now is the time to be involved!
Hi All,
It’s that time again to raise your voices and elect your board! Can you believe it’s been over a year and one day already?
It’s a time for you to stand up, help your community and volunteer to serve!
Squeak wants you!
Every year we elect the SOB (Squeak Oversight Board) consisting of seven members from our community. The current board members are:
Now until Friday 21st of March 2025, 18.00 UTC: Nominations of SOB members and campaigning!
Candidates should nominate themselves and start their campaign on the squeak-dev mailing list. Or if you nominate someone else, make sure that person really wants to run. 🙂 I will not put anyone on the candidate list until that person makes it known on squeak-dev that he/she intends to run.
During this period, the candidates should ideally present themselves on squeak-dev, unless they have already done so, and the community can ask questions.
I encourage you to reach out to potential candidates, people that are active in the community and represent your views, and ask them to run.
Some people will not run without encouragement. Also, I know that some people wait to the last minute to run for the board to see if others will run but please consider getting this year off to a faster start and just jump right in!
The schedule and process are as follows:
Now until Friday 21st of March 2025, 18.00 UTC: Nominations of SOB members and campaigning!
Friday 21st of March 2025, 18.00 UTC: Candidate list is finalized.
Friday 21st of March 2025, ~19.00 UTC: Online election starts.
Friday 4th of April 2025, 19.00 UTC: Online election ends.
Results will be announced immediately after the election ends.
The voting period is two weeks long and ballots are sent out via email.
And how do you end up on the voter list? See below. 🙂
IMPORTANT: New voters will NOT be added once the election is started.
You MUST try to get on the voter list before the online election starts or you will NOT be able to vote. If your email address has changed please try to make sure it is changed on the list of voters before the election starts.
If you were invited to vote last year you are already on the voter list, no worries! If you are a new Squeaker and wish to vote you should do ONE of the following:
Get a “known” Squeaker to vouch for you. If a known Squeaker sends an email to voters (at) squeak.org giving me a name and email for you, then I will add you.
Send an email to voters (at) squeak.org yourself (and CC to squeak-dev if you like) with information/arguments showing me that you are indeed serious about voting and that you are indeed a Squeaker.
When the voting period starts all voters will receive an email with instructions and a link to the voting website.
If there are any further questions, just reply in this thread and I will closely track it – or send email to voters (at) squeak.org which points to me.
Would you like to view a demonstration of how to take advantage of the Morphic animation system in Squeak? If so, you are in luck! A new video has recently been posted that takes you through the steps of doing just that. The Morphic animation system in Squeak offers a simple way to animate and interact with objects in your environment. Whether you are building basic animations or more complex interactive systems, Morphic provides a wealth of possibilities for both beginners and seasoned developers alike. You can watch the video titled “A BlinkingRectangle Morph in Smalltalk” here.
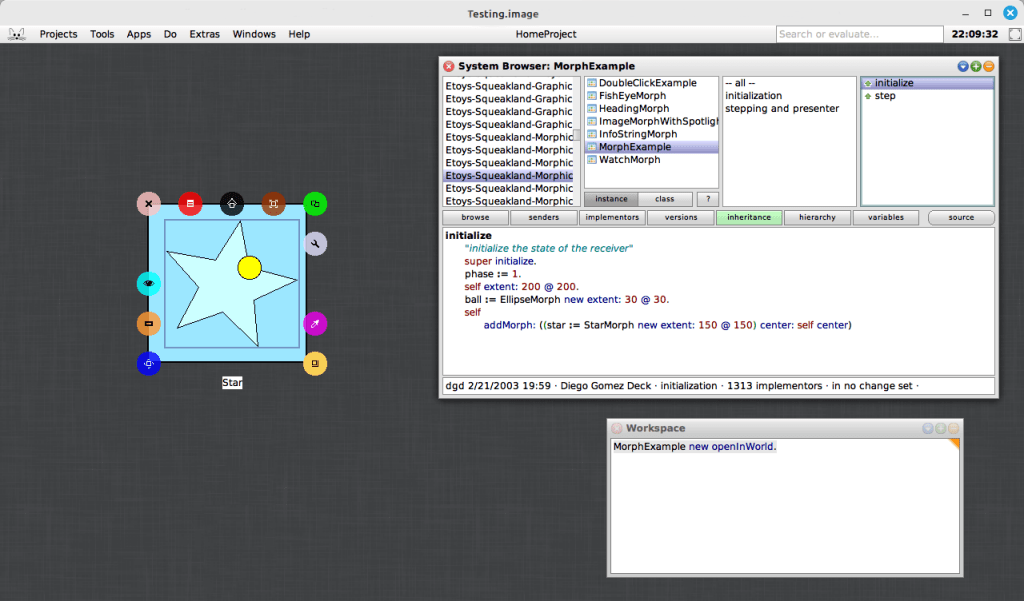
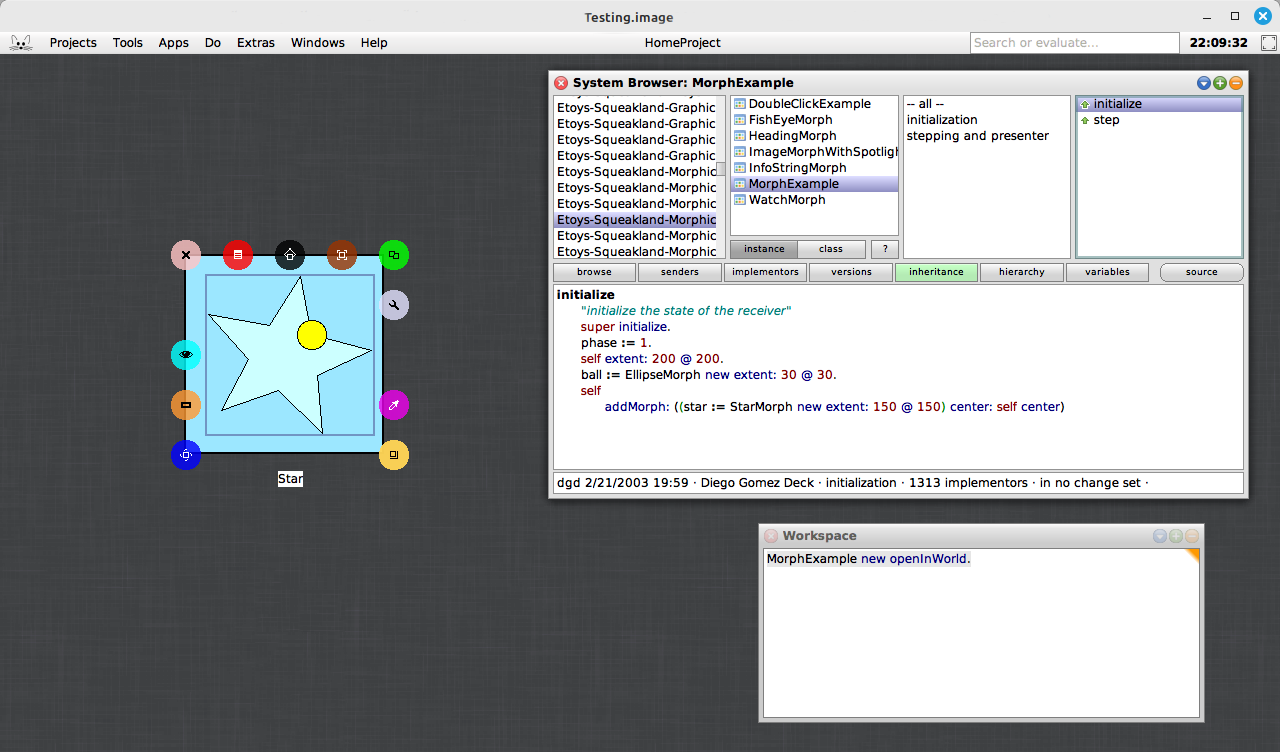
In addition to the video tutorial, you can explore a very simple, yet powerful example included in the Squeak image. This example morph can be found with the somewhat hard-to-remember name, MorphExample. By evaluating “MorphExample new openInWorld” (without the surrounding parentheses) in a Workspace, you can discover how easy it is to make morphs perform various actions. This demonstration emphasizes the beauty of the Morphic system’s simplicity: you do not need to write complex code to animate objects. Instead, you can focus on creating rich, interactive applications and interfaces with just a few lines of code.
One of the most compelling aspects of the Morphic system is how effortlessly it enables dynamic, real-time interaction, especially when used within the Smalltalk environment. Compared to many other graphical frameworks, where handling interactions often requires more complex event handling and manual updates, Morphic allows you to create interactive, animated objects with minimal code. For example, you can open a halo on the star, resize or rotate it, and the animation will continue to perform and adjust dynamically to the star’s new dimensions. This responsiveness highlights the simplicity and flexibility of the Morphic system, making it an ideal choice for building interactive systems without the need for manual recalculations or updates.
If you are interested in delving deeper into the Morphic system, you can access Chapter 12 of Squeak by Example for more detailed explanations and examples. The book offers a clear guide to the system, making it an excellent resource for developers looking to better understand Morphic. You can read the full chapter here.
For those who want to learn more about using halos with morphs in Squeak, there is another excellent video resource available. The video “Morphic Halo icons in Squeak Smalltalk” demonstrates how to interact with the Morphic halo icons to manipulate morphs in the Squeak environment. Whether you are new to Squeak or already familiar with the basics, this video provides valuable insights into how halos can be used to interact with morphs. Check it out here.
Have a great time with Smalltalk and keep on Squeaking!
The holidays may be over, but the presents are still arriving from the UK Smalltalk User Group! Videos of previous presentations have been released over the past month, covering a variety of interesting topics–a total of 57 as of this writing! Be sure to check out their new YouTube channel at https://www.youtube.com/@UKSTUG. Also, be sure to visit their homepage at https://www.uksmalltalk.org/, and if you would like to attend any meetings, their Meetup site can be found at https://www.meetup.com/ukstug/.
Have a great time with Smalltalk and keep on Squeaking!
This article kicks off a series designed to introduce programming to beginners through the creation of a simplified space shooter game using Squeak, an open-source implementation of the Smalltalk programming language. By breaking down the process into a series of manageable lessons, the aim is to provide an accessible and interactive entry point into the world of programming. This series will guide learners through the process of building a game from the ground up while introducing them to essential programming concepts along the way. Upon completion, and with the accompanying resources such as source code, images, and a sound file, students will have everything they need to recreate or enhance the game.
Who This Series is For
The intended audience for this article and the accompanying series includes both young learners and adults who are new to coding or to Smalltalk. Whether you are a student, educator, or hobbyist, these lessons are tailored to make programming approachable and enjoyable. Throughout the series, we will dive into key programming principles – such as object-oriented design, the concept of “Morphs” in Squeak, and more – at a beginner-friendly pace. Each lesson is supplemented with practical examples. If you are interested in starting with something fun and educational, and you are curious about how games are made or how Smalltalk can be used in a modern development environment, this series is for you.
Why a Game, and Why Squeak/Smalltalk?
So why a game, and why in Squeak/Smalltalk? Why not? Everybody understands the domain of games, or gaming. That is, the mechanics, interactions, and goals – such as managing player input, controlling game characters, defining win/loss conditions, and creating interactive environments. Games are a universal medium that spans across ages and cultures, from simple board games to complex video games. This familiarity makes games an excellent starting point for teaching programming concepts, as the mechanics and goals are intuitive to most people. Moreover, games require a variety of programming elements to function, such as managing user input, handling graphics, implementing game rules, designing levels, and even creating sound and music. These components provide a rich environment for introducing and practicing key programming skills – like decision-making, loops, object-oriented design, and event handling – while keeping learners engaged with a fun, practical outcome.
Why Squeak/Smalltalk is the Right Tool
Squeak makes all of this very easy, and you do not need to learn anything more than Smalltalk to get started. The language is intuitive and enjoyable to use, and Squeak provides a powerful and engaging development environment. While games may not balance your bank account, they can serve as an excellent resource for learning programming or a new language. Squeak/Smalltalk, in particular, makes this process both accessible and enjoyable.
How This Series Came to Be
This article introduces a series of lessons based on a simplified version of a space shooter game I developed using Squeak. The project, which was both fun to create and my first full Squeak program, turned out to be an ideal way to teach my middle school-aged son Smalltalk, as well as the fundamentals of object-oriented programming (OOP). Although he had prior programming experience, he quickly grasped the language due to its simplicity and the interactive nature of the environment. The natural syntax of Smalltalk, combined with the user-friendly environment, not only made it easier for him to solve problems but also allowed him to be more creative, without needing to alter his natural problem-solving approach. Both the language and the environment “got out of his way,” enabling him to express himself more easily and effectively.
What Will Be Covered in the Series
The lessons in this series are designed to introduce key programming concepts – such as classes, methods, debugging, and user interface design – through the process of building and modifying a game. You can find the complete list of lessons on the Shooter Game site. Each lesson was written daily, and I discussed topics both before and during the lesson to provide additional detail and ensure a deeper understanding. This approach allowed me to offer relevant explanations exactly when they were needed, based on my son’s progress and evolving needs.
For each article, I will aim to provide additional helpful information that may not be included in the lessons themselves. If you feel any details are missing or could be useful, please let me know, and I would be happy to provide further information.
Interactive, Live Coding Approach
The hands-on, live coding approach in these lessons encourages learners to experiment and learn in real time, making the process both educational and enjoyable. Each lesson also comes with a downloadable PDF version of the lesson page for easy offline reference or printing. The entire series progressively builds upon itself, allowing learners to gradually develop their programming skills as they move through the lessons.
Lesson 1: Creating and Positioning Morphs
For today’s lesson, we will dive into the first step in building our game: “Creating and Positioning Morphs.” In this lesson, we will introduce the concept of a Morph and explore how to create and manipulate these visual objects within the Squeak environment. Understanding Morphs is a crucial part of game development in Squeak, as they serve as the foundation for all the interactive elements of the game.
What is a Morph?
In Squeak, a Morph is an interactive graphical object. Like everything in Smalltalk, a Morph can be interacted with through messages. It is not a static, lifeless image on the screen, but rather a lively object waiting to interact with its environment. You can send a message to a Morph to receive information about it or to perform an operation. Everything you see when running Squeak is a Morph object. This presents some very exciting capabilities, as it provides you with the ability to create graphical objects, which can interact with the world (the entire Squeak environment – its display screen in this case) and the world can interact with them.
The Squeak world works using a coordinate system. The coordinate values can be absolute or relative. Each coordinate value is represented as a point, which has an X coordinate and a Y coordinate. For example, a Squeak world (remember, this will be the full size of the display screen in the Squeak environment) with a display size of 1024×768:
The point 0@0 is the top-left corner of the screen.
The point 0@768 is the lower-left corner of the screen.
The point 1024@768 is the lower-right corner of the screen.
The point 1024@0 is the top-right corner of the screen.
Every point in between represents a location within the world. Points can exist outside of that world too; however, they would not be visible.
In this game, everything is a subclass of Morph, so you will be using Morphs a lot.
Before beginning Lesson 1, it would be very helpful to read Chapter 1 of the Squeak By Example book (available as a free PDF, SBE-6.0.pdf), an excellent resource for learning Squeak and understanding its environment. Afterward, you can go straight to the lesson here.
Additional Resources
To access the full series of lessons and resources for the space shooter game, Shooter Game, visit the lesson site at https://scottgibson.site/ShooterGame/. There, you will find the complete set of lessons and their associated PDFs, along with the source code, images, the sound file, and other useful resources. You can even play the game directly in your browser (using the awesome SqueakJS!). Whether you are a beginner or looking to learn more about Squeak/Smalltalk, its environment, and its tools, these resources will guide you through each step and provide everything you need to recreate or enhance the game.
In recent months, Craig Latta has been exploring the integration of AI language models, particularly GPT-4, into Smalltalk development environments, with the goal of enhancing workflows and improving conversational interactions with the language model. Rather than relying on traditional coding methods, Craig has focused on fine-tuning the model using English system prompts, with promising results. This approach aims to guide the AI’s behavior through prompt evolution, rather than direct coding, leading to surprisingly effective outcomes.
One of the key insights from this experimentation is that GPT-4’s pre-existing knowledge of Smalltalk and Squeak provides a solid foundation for further fine-tuning. By applying constraints to system prompts – such as instructing the model to avoid sending messages to access objects when direct access via instance variables is possible – Craig has steadily refined the AI’s responses.
Conversing with the Language Model in Squeak
A central goal of the project was to enable conversations with the AI model from within any text pane in Squeak, utilizing Smalltalk’s classic “do it,” “print it,” and “inspect it” functionalities. To achieve this, Craig modified the Compiler>>evaluateCue:ifFail: method to handle UndeclaredVariable exceptions. When an undeclared variable (e.g., “What” in “What went wrong?”) triggers an exception, the model object underlying the text pane takes over, interpreting the next chat completion from the language model.
The model objects Craig has focused on are instances of Smalltalk’s Debugger and Inspector. A notable feature of this approach is that it logs all interactions – whether English prompts or Smalltalk code – into the changes log, just as it would with traditional code. Each model object maintains a reference to the most recent chat completion, allowing successive prompts to be interpreted in the context of the entire conversation, fostering dynamic and evolving dialogues.
Practical Results and Application
The system has already shown practical value in a live development environment. For example, when evaluating a prompt like “What went wrong?” in the debugger, the language model provides surprisingly accurate and detailed responses, as if debugging the code itself. Similarly, when tasked with generating Smalltalk code – such as instructions for selecting the most recent context with a BlockClosure receiver – the debugger manipulates the code correctly, demonstrating the viability of using the AI in real-time development workflows.
Future Exploration
Currently, Craig is expanding the scope of the AI’s functionality. He is experimenting with prompts that describe the application’s domain, purpose, and user interface, eager to see how the model can assist in these areas. This exploration has the potential to significantly improve Smalltalk development workflows by integrating AI-driven conversational interactions into the process.
As AI models continue to evolve, Craig anticipates further advancements in integrating these models with development environments, offering new opportunities to enhance productivity, troubleshooting, and even code generation. The future of AI-enhanced Smalltalk development looks promising, and this project represents an exciting first step. For more details on Craig’s exploration of AI in Smalltalk development, be sure to check out his full blog post at thisContext.
Growing Interest in AI for Squeak Development
There has been growing interest in applying both semantic understanding and generative AI to the Squeak environment, as these technologies hold great promise for improving development workflows. By combining the ability to generate code with deeper understanding and reasoning, developers are beginning to explore new ways AI can assist with both writing and debugging Smalltalk code. This integration could help streamline development, enhance debugging efficiency, and even assist in explaining complex code patterns, all within the context of Squeak’s unique environment. Or, it could take over the world. You decide. As interest continues to grow, a future article and video from a recent demonstration will explore these advancements in more detail, offering insights into how AI-driven approaches can enhance Smalltalk programming and provide practical demonstrations of these evolving tools.
Have a great time with Smalltalk and keep on Squeaking!
When developing complex systems, encountering errors that leave your project in a frozen state can bring much sadness and consternation. For developers working with Squeak/Smalltalk, a frozen image refers to a situation where the system becomes unresponsive. This can happen due to various issues, including deadlocks, infinite loops, or recursive operations in Smalltalk code, which can cause the VM to freeze, hang, or lock up.
A recent discussion in the Squeak community highlighted how one such incident, caused by a stuck semaphore during an image load, turned into an opportunity for both recovery and valuable practices in safeguarding against future mishaps. You can explore the full conversation in the Squeak-dev mailing list thread (here).
The Problem: Semaphore Deadlock in the Image File
In this case, a developer encountered an issue while attempting to draw in multiple background threads, using a chain of semaphores to manage the UI thread. After resolving an error in one of the background threads, the drawing process was resumed. However, it was found that the image would fail to load. Instead of opening, the image became unresponsive and effectively “frozen.” It had likely become stuck due to a semaphore waiting for a signal that would never come. This left the image unresponsive and effectively unusable – or so it would have seemed.
Recovery Options: DoItFirst and Debugging
The good news is that there are several options available for recovering from such failures.
For developers dealing with frozen images at startup, Squeak provides a mechanism called DoItFirst. This is a class that is processed at the very beginning of the image startup sequence, allowing developers to inject custom code or actions before the main system fully loads. By using command-line arguments like --debug, it is possible to force the image to enter the debugger at the earliest point in the startup process, allowing issues to be diagnosed and fixed before the image fully loads.
Additionally, for situations where the issue is well-understood, the --doit option allows Smalltalk expressions to be passed and executed before any problematic behavior occurs, giving developers a chance to resolve issues before they impact the image during loading.
Another option is to open the Virtual Machine (VM) in a debugger. In the specific case of a stuck semaphore, you can set a breakpoint in interpret. Run the VM until it reaches interpret a second time (the first invocation does some initialization). At this point, you can use printAllProcesses to locate the stuck process. This should display the semaphore the process is waiting on. Once identified, you can invoke synchronousSignal with that semaphore to unstick it and restore functionality without losing significant progress. While this technique can specifically handle a stuck semaphore, it could also be helpful for other cases of system hangs or unresponsiveness.
The Importance of Backups and Versioning
While debugging and recovery tools are invaluable, it is clear that prevention is equally important. Routine backups and effective versioning are essential practices that can mitigate the risks associated with frozen images and other failures. One practice that proved helpful in this case was maintaining regular system backups, which made it possible to quickly restore a previous version of the image with minimal data loss. However, more granular versioning, especially in environments with frequent risky changes, would provide an additional layer of safety.
Specifically, incremental versioning of the image can be a lifesaver when things go wrong. By saving a new version of the image each time a meaningful step in development is reached, developers can create a clear history of their work. This allows them to revert to earlier versions of the image if issues arise, minimizing the impact of failed changes and speeding up the recovery process. Incremental image saves help ensure that even if an image becomes frozen or corrupted, a previous, stable version can be restored with minimal effort.
The Robustness of Squeak: Multiple Recovery Options
One of the key takeaways from this experience is how robust Squeak is in terms of recovery options. Even when a frozen image occurs or the system becomes unresponsive, Squeak offers multiple layers of recovery mechanisms. Whether using DoItFirst to inject custom code during startup or interacting with the VM through a debugger to manually resolve issues with semaphores, there are a variety of ways to recover from errors and get back on track.
Additionally, Squeak’s development environment is designed to be highly flexible, encouraging experimentation while ensuring that recovery is always possible. One of the key advantages of Squeak is that all the code executed or saved during development is stored in the .changes file. This makes it possible to recover from almost any issue, as the system is built to retain all your code. Even if an image becomes frozen or corrupted, the code itself is never truly lost. With the resources mentioned in this article, developers can restore their environment and continue their work. In Squeak, code is safe; no matter what happens to the image, your code can always be recovered.
Conclusion
In conclusion, while Squeak’s development environment offers tools to recover from serious errors, the most effective defense is good preventive practice: maintain regular backups, version your work consistently, and always be mindful of the unexpected.
For more detailed information on using DoItFirst to debug and recover your Squeak image, visit the DoItFirst Swiki page (here). If you encounter issues like crashes or freezes in Squeak, there are various levels of potential failure to consider, and helpful guidance is available in the What to do if Squeak crashes or freezes resource (here), which offers insight into diagnosing and resolving different types of system freezes or crashes.
Have a great time with Smalltalk and keep on Squeaking!
In a recent email to the Squeak developers mailing list (here), Tim Rowledge shared insights from the Raspberry Pi team regarding beneficial tweaks to memory configuration in the firmware, specifically focusing on NUMA (Non-Uniform Memory Access). These updates are part of ongoing efforts to enhance SDRAM performance for both Raspberry Pi 4 and 5 models.
Performance Enhancements Explained
Recent testing revealed that the 8GB models sometimes performed worse than the 4GB models due to SDRAM self-refresh consuming bandwidth, especially since larger sizes require longer refresh times. Investigations showed that adjusting the SDRAM refresh interval could yield better results. Monitoring temperature indicated that a faster refresh rate was feasible, which helped reduce overhead. Micron confirmed that 8GB SDRAM could safely operate with 4GB refresh timings.
Ongoing tweaks to SDRAM and ARM settings have led to small but cumulative performance improvements, typically around 1% per update. A significant issue noted is the competition among multiple ARM cores accessing SDRAM, leading to inefficiencies when multiple pages in the same bank are accessed. Implementing NUMA can help manage this by splitting SDRAM into regions, allowing for more efficient allocation and improved performance in multi-core tasks.
Benchmarking Squeak Smalltalk
Tim tested these configurations on a Raspberry Pi 5 equipped with NVMe storage, running benchmarks from the Benchmark Shootout suite. The tests included:
nbody
binary trees
chameneos redux
thread ring
Results of the NUMA Configuration
The performance comparisons between a NUMA-configured Raspberry Pi 5 and a standard setup yielded notable results:
nbody: Improved from 5.157 seconds to 5.095 seconds (1.2% improvement)
binary trees: Improved from 3.398 seconds to 3.096 seconds (8.9% improvement)
chameneos redux: Improved from 7.274 seconds to 5.239 seconds (28% improvement)
thread ring: Improved from 8.347 seconds to 7.783 seconds (6.7% improvement)
These findings indicate that even minor adjustments in RAM timings can lead to substantial performance gains, particularly highlighted in the chameneos redux benchmark.
Conclusion
Tim Rowledge’s testing of the Raspberry Pi team’s memory configuration tweaks has revealed valuable performance gains. By implementing NUMA and optimizing SDRAM settings, Raspberry Pi users can unlock significant benefits. These small adjustments can lead to meaningful improvements, making the Raspberry Pi an even more effective tool for development and education. You can find Raspberry Pi team’s recommended tweaks here. Additionally, you can explore the bug report thread detailing the testing and findings here.
Have a great time with Smalltalk and keep on Squeaking!