The California Smalltalkers meeting on August 13 at 7:00 p.m. PDT will feature a presentation by Craig Latta on his recent work with Catalyst, a WebAssembly GC (WASM GC) implementation of the Open Smalltalk virtual machine. Latta will share surprising results from experiments using AI models to dynamically translate Smalltalk methods into WASM functions.
The talk will also examine the historical evolution of dynamic stack machine optimization and explore BNF-level optimizations enabled by the Epigram compilation framework.
The meeting will additionally include community lightning talks, giving attendees an opportunity to highlight current projects and ideas. Participants are invited to draw inspiration from their peers, and those interested in giving a longer presentation in the future are encouraged to reach out to the organizers.
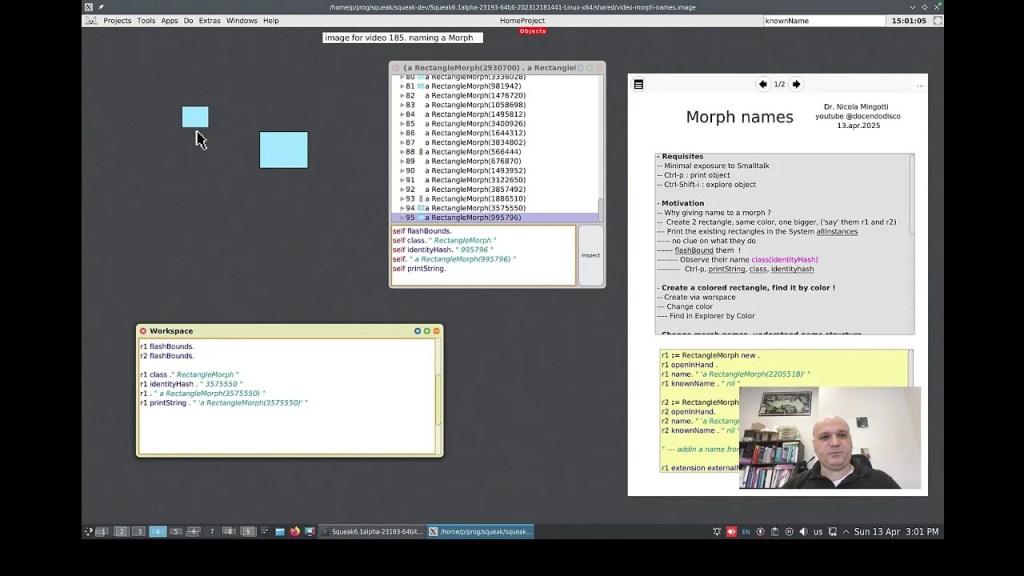
Dr. Nicola Mingotti has released a new in-depth tutorial video that explores how to identify and name Morphs in the Squeak/Smalltalk environment. If you have ever wondered how to refer to a specific Morph – for example, how to say “make that Morph yellow” – this video walks you through several effective techniques.
Throughout the video, you will learn how to use tools such as the object explorer and the workspace to better understand and interact with objects in Squeak. The tutorial introduces a variety of methods, including assigning names to Morphs, identifying them using properties such as identityHash and knownName, and inspecting objects with user interface tools that are not immediately obvious to new users.
This tutorial is particularly useful for those who wish to go beyond the basics and gain more precise control over their Squeak projects. It also includes several helpful interface tips that may be difficult to discover independently.
Let us dive into the exciting process of game creation!
In this lesson, you will begin writing the actual code that brings your game to life. The previous lessons prepared you by helping define the game’s key objects and their responsibilities. Now, with those ideas in place, it is time to create your first class in Smalltalk: ShooterGame.
This class will act as the canvas for everything else that follows. Though it may seem plain at first, much like an artist’s blank canvas, your ShooterGame Morph will soon host a lively collection of interactive game objects – ships, enemies, shots, and more. Unlike a painting, however, this canvas can respond, animate, and change as your code evolves.
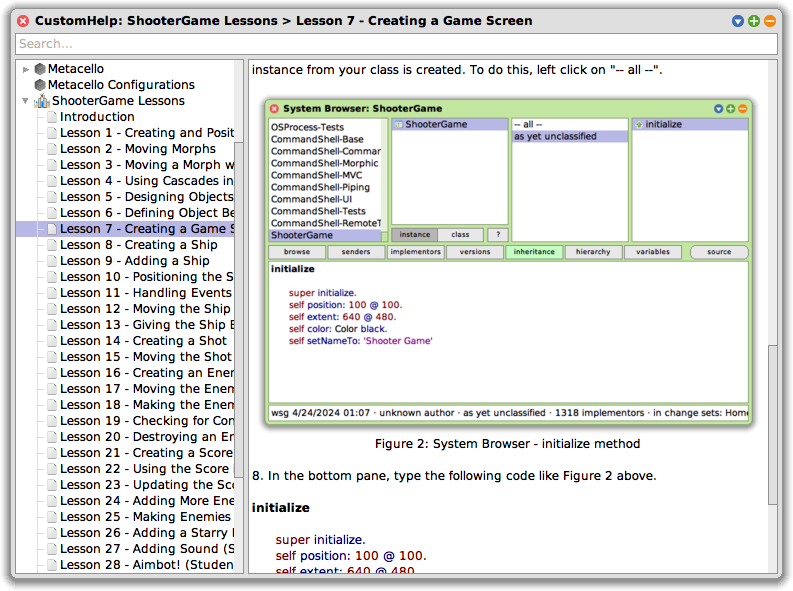
Using the System Browser
The work begins in the System Browser, a powerful tool within the Squeak environment where you can write, view, and organize your code. You can open the System Browser from the main menu under Tools → Browser, or by left-clicking on the desktop background and selecting Browser.
This browser is not the only place you can write code in Squeak, but it is the one you will use most frequently as you build and modify your game. You will use it to define classes, write methods, organize your code into categories, and explore existing functionality that your objects can build on.
ShooterGame as a Morph
When you create your ShooterGame class, you define it as a subclass of Morph. This design choice is essential. A Morph is a graphical object in Squeak that can be added to the screen, moved around, colored, resized, and interacted with. By making ShooterGame a Morph, you give it the ability to appear on the screen and act as a visible, interactive container for the other game elements.
This inheritance relationship also means that ShooterGame will share the capabilities of Morphs – like positioning and drawing – while allowing you to add new, game-specific behavior through your own methods.
Understanding Initialization
After defining your class, you will write its first method: initialize. This is a special method that sets up a new instance of the class when it is created. It is also an ideal place to define how the object should appear and behave initially.
An instance of a class is the actual object that gets created from that class. Think of the class as a blueprint or a set of instructions – like the design for a computer. That design tells you what the computer will have and how it will work. But until someone actually builds a computer from that design, you do not have a real one. The same is true in programming: the class is the design, and an instance is the real, usable object created from that design. Every time you create a new object from a class, you are making a new instance of it. And because everything in Smalltalk is an object, even the class itself is a kind of object – one that can do things, not just describe them!
Inside the method, you will encounter super initialize. This line is important. It tells the system to first run the initialize behavior of the parent class – in this case, Morph – before adding your custom setup code. An initialize method should always start by sending super initialize. Skipping this line can lead to unexpected issues because it would prevent an object from preparing itself properly.
Following that, you will define the Morph’s position and size using the position: and extent: messages. In Squeak, extent refers to the width and height of the Morph – think of it as how much space it occupies on the screen. The coordinate system in Squeak starts at the top-left corner of the screen (0 @ 0), and each point is written as an x and y pair (e.g., 640 @ 480). These lines of code determine where your game window will appear and how large it will be.
You also set the background color to black and give the object a name using setNameTo:. These finishing touches help establish your game’s visual style and identity.
Positioning and Sizing
In Squeak, the World refers to the entire display area of the environment – the space where all graphical objects (Morphs) appear and interact. It is the backdrop of your development tools, your game, and the broader environment in which your game objects will live and move. Even the tools you use to write your code – such as the System Browser – are Morphs themselves, sharing the same space and able to interact with the same environment as your game.
Squeak uses a coordinate system to place and size Morphs on the screen. The top-left corner of the World is the origin (0 @ 0). When you set a Morph’s position to 100 @ 100, it will appear 100 points from the left and 100 points from the top. The extent describes the Morph’s width and height – how much space it will take up on the screen. These values give you precise control over where and how your game interface is laid out.
Seeing the Results
Even after completing just this lesson, you will be able to see the first visible result of your code. Though the game is not yet playable, the space in which it will take shape is now visible and ready for action. The foundation is laid, and every lesson from here will build upon it.
Remember that these lessons are designed for live coding – you are encouraged to run, modify, and explore your work as you go. That is one of the great strengths of Smalltalk. The lessons in this series are designed for live coding, meaning the game does not need to be closed and restarted when changes are made. You can follow through the lessons just as easily without live coding; however, you may not learn as many topics, as some only arise from using live coding. Also, remember that, unlike some other programming languages, Smalltalk does not require a final period (.) at the end of a method. The final period in the last expression is optional.
And finally, remember to save your work once you have successfully completed the lesson. This ensures you can pick up right where you left off next time or provides a good recovery option if something should go wrong.
Lesson Resources
To access Lesson 7 and the full series of tutorials for building the Shooter Game, visit https://scottgibson.site/ShooterGame/. There you will find everything you need to follow along, including PDFs, Squeak Help lesson content, source code, images, sound files, and other game assets. This site not only provides everything you need to progress but also even allows you to play the game directly in your browser using SqueakJS. Whether you are just getting started with Squeak/Smalltalk or advancing your skills, these resources will help guide you as you move forward through the game development process.
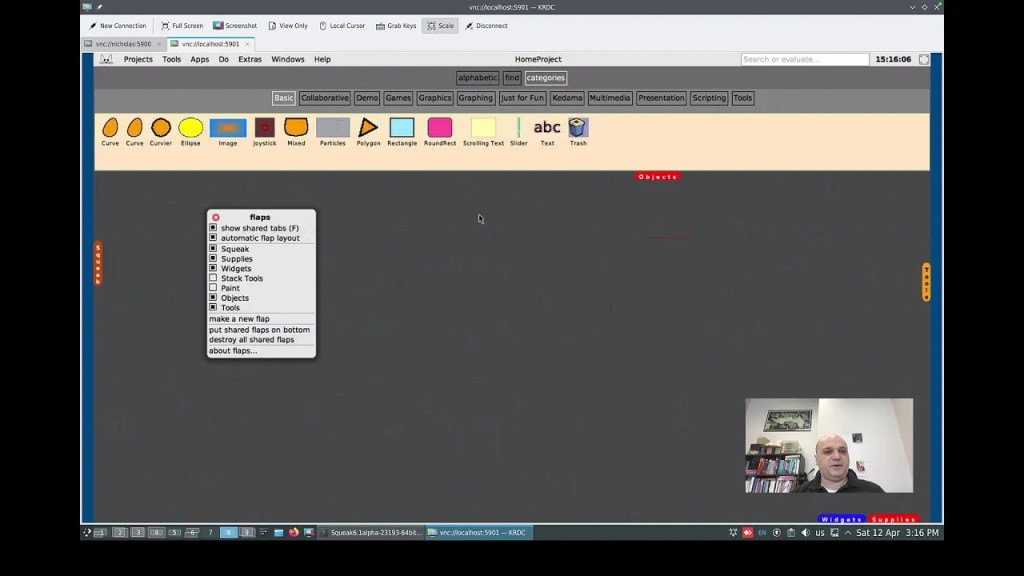
Dr. Nicola Mingotti has created a short introductory video, “Flaps in Squeak Smalltalk,” that explains how to get started using flaps in the Squeak environment. In the video, he demonstrates how to enable flaps, use them to drag objects into the Squeak World, and explores a few basic configuration options. If you are new to flaps or looking for a quick overview, this video provides a clear and helpful starting point. You can watch it here.
Have a great time with Smalltalk and keep on Squeaking!
In the last lesson, you were asked to identify the objects present in Figure 1 of Lesson 5. From the example, we will be using the object names ShooterGame, Ship, Shot, Enemy, and Score. These names have been chosen because they are clear, descriptive, and directly relate to the roles these objects will play within the game. Each name corresponds to a specific function within the game, and using such intuitive names helps to keep the code organized and easy to understand.
The reason these names were selected is tied to their roles and responsibilities within the game. As you will see in the following explanations, each object has a clear purpose. At the core of everything is ShooterGame, which provides the game screen – the boundary within which all gameplay takes place. It serves as the origin point for the entire game, coordinating the creation and management of other game elements and the overall flow of activity. The Ship represents the player’s character, allowing for movement and interaction with enemies. Shot represents the projectiles fired by the player, which interact with enemies to destroy them. Enemy objects are the targets that move across the screen and can be destroyed by shots. Finally, the Score object tracks the points the player earns by destroying enemies. The following sections of this article will further explain the roles and responsibilities of each object in detail, providing a better understanding of how they work together in the game.
Key Object Behaviors
ShooterGame: The ShooterGame object provides the screen boundary and serves as the foundation from which the entire game emerges. It defines the playable area that other objects use to determine their positions and limits. In addition to supplying this essential structure, ShooterGame also acts as the central controller of the game. It initializes the Ship and Score at the start and recreates Enemy objects when all have been eliminated. It also coordinates the overall flow of the game, including when it begins and ends, and keeps track of the main objects involved in gameplay.
Ship: The Ship is controlled by the player, and its movements will be essential to the game. You can program the Ship to move in all four directions: up, down, left, and right. Unlike many games, the ship will not be destroyed if it comes into contact with an enemy, meaning the player can continue to control the ship without worrying about direct collisions with enemies. The ship’s movement and interactions with other objects will be crucial to progressing through the game.
Shot: The Shot object represents the projectiles that the player shoots at the enemies. Shots will move in an upward direction as the player fires them. The behavior of the Shot is simple: when a shot hits an enemy, the enemy is destroyed. This interaction between the shot and the enemy is one of the core mechanics of your space shooter game.
Enemy: The Enemy objects will move left and right across the screen, adding a dynamic element to the game. There will be three Enemy objects in the game, each with its own movement pattern. As the player’s shots hit the Enemy objects, the Enemy objects will be destroyed, and the player will earn points.
Score: The Score object is responsible for keeping track of the player’s points. Each time an enemy is destroyed, the player earns 100 points, and the score increases accordingly. The score is updated when a Shot hits an Enemy. Because the Score object displays its information on the ShooterGame screen, it maintains a relationship with it.
Object Interactions
Now that each object’s role and behavior has been identified, it is important to understand how these objects interact during gameplay. Their interactions define how the game functions and how players experience the game world.
Ship and ShooterGame: The Ship appears within the game screen provided by ShooterGame. It moves in response to player input and uses the boundaries of the game screen to determine how far it can travel. The screen boundaries provided by ShooterGame limit how far the Ship can move. ShooterGame provides the space in which the Ship operates, but it does not control the Ship’s movement.
Ship and Shot: When the player activates a firing action, the Ship releases a Shot that travels upward. This interaction allows the player to engage with enemies and is central to gameplay. The firing of a Shot gives the player a way to respond to the movement of Enemy objects on the screen.
Shot and ShooterGame: The game screen provided by ShooterGame establishes the upper boundary for shots. When a Shot moves upward and reaches the top of the screen, it is removed from play. ShooterGame does not manage or direct shots, but its boundaries help determine when a Shot leaves the gameplay area.
Shot and Enemy: If a Shot comes into contact with an Enemy during its path, both the Shot and the Enemy are removed from play. This interaction is a key part of gameplay: successful hits on Enemy objects are the player’s goal. When this happens, the Score is also updated to reflect the player’s progress.
Enemy and ShooterGame:Enemy objects move left and right across the game screen using the screen’s width to guide their motion. The screen boundaries provided by ShooterGame limit how far Enemy objects can move. When an Enemy is hit by a Shot, it is removed from the game screen.
Score and ShooterGame: The Score is displayed on the game screen and increases when an Enemy is destroyed. ShooterGame provides the location where the Score is shown during gameplay. As the game progresses, the Score gives players feedback on their performance and accomplishments.
Understanding how these objects behave and interact lays the groundwork for building a playable game. By thinking carefully about each object’s role and how it connects with others, you will be better prepared to implement the necessary features in code. These foundational concepts will continue to guide your work as you move forward with designing and programming the game’s functionality.
The tutorials are now also available for use inside the Squeak development environment through the Squeak Help System. Once installed, this resource allows you to read and follow the lessons directly within Squeak, making it easy to experiment with code and concepts without leaving the environment. The Help System documentation is included as part of the downloadable resources for the game and can be added to your Squeak image just like the other game assets.
Lesson Resources
To access Lesson 6 and the full series of tutorials for building the Shooter Game, visit https://scottgibson.site/ShooterGame/. There you will find everything you need to follow along, including PDFs, Squeak Help lesson content, source code, images, sound files, and other game assets. This resource also allows you to try out the game directly in your browser using SqueakJS. Whether you are new to programming, just getting started with Squeak/Smalltalk, or building on prior experience, these materials will support you as you continue developing your own version of the game.
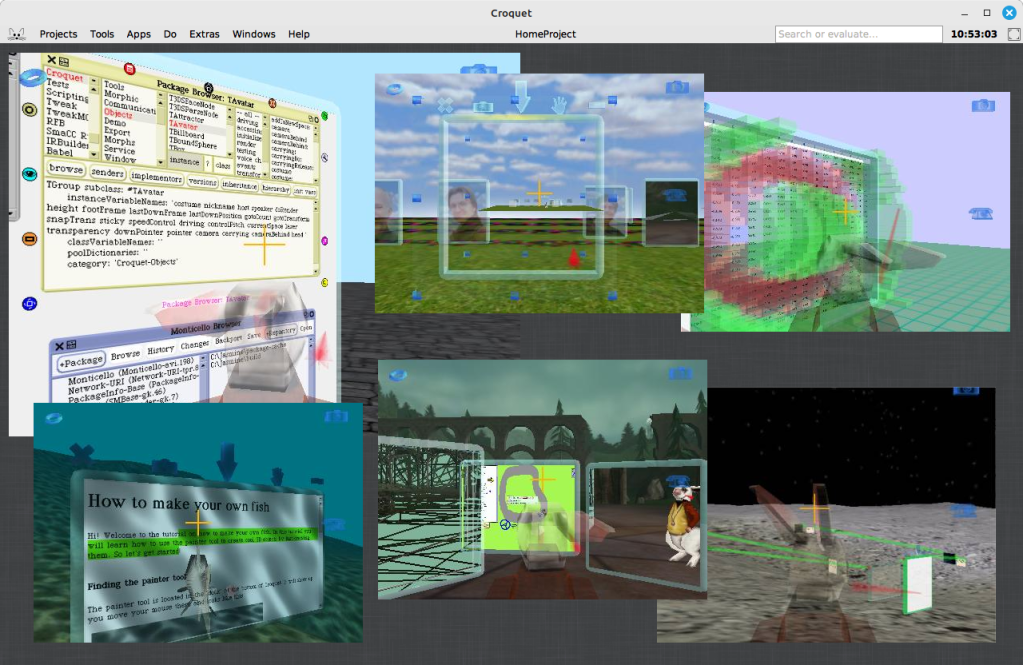
An initiative has recently emerged within the Squeak community to explore bringing Croquet into the modern Squeak 6.0 environment, with their efforts opening up possibilities for personal and educational applications, and potentially paving the way for long-term developments. Community members Edwin Ancaer and Timothy have taken it upon themselves to explore, port, and troubleshoot Croquet – an ambitious collaborative 3D environment originally designed to run in earlier 32-bit versions of Squeak.
Croquet was a groundbreaking software architecture designed for deep collaboration, originally built as an open, free, and highly portable extension of the Squeak programming system. It provided a platform for both development and real-time collaborative work, with no separation between user and developer environments. Focused on 3D shared spaces, Croquet enabled users to interact in context-based collaborations, observing each other’s actions and focus in real time. A collaboration protocol called TeaTime powered this synchronization, and rendering was based on OpenGL. While newer, proprietary descendants of Croquet have evolved since, the version being revived in Squeak 6.0 reflects this original, exploratory vision.
Croquet Jasmine, a developer’s release of the system, is available and can be run live in a web browser using the SqueakJS virtual machine – allowing others to easily explore Croquet without a local setup. You can try a live version here: codefrau.github.io/jasmine/.
Technical Hurdles and Graphics Considerations
Efforts began early in the process, building on Nikolay Suslov’s work to get the original Open Croquet running on the latest versions of Squeak 5.x. His work laid the groundwork for achieving compatibility with Squeak 6.0. You can explore his repository here: github.com/NikolaySuslov/croquet-squeak. You can also check out detailed steps Nikolay has provided to bring Croquet into an early alpha version of Squeak 6.0 here.
A primary obstacle encountered was the tight coupling between Croquet and OpenGL 1. As Vanessa Freudenberg pointed out, OpenGL has been deprecated on macOS for years, complicating efforts to run the system on 64-bit machines. Vanessa suggested considering Vulkan or OpenGL 4 as possible alternatives for the rendering backend.
In consideration of a long-term solution, it is helpful to explore the potential paths forward, each with its own trade-offs:
Re-implement OpenGL 1 as a compatibility layer – Offers limited long-term value and would still not work effectively on macOS due to deprecated OpenGL support and the absence of modern graphics capabilities. Efforts like MoltenGL, which aim to bridge OpenGL to Metal, do not support OpenGL 1, making this path particularly challenging.
Migrate to a modern OpenGL (3.x or 4.x) – More viable than OpenGL 1 in terms of features, and partially supported on macOS (up to OpenGL 4.1). However, it is deprecated and no longer maintained on Apple platforms, making it an unstable foundation for future development.
Adopt Vulkan for high performance – A modern, low-overhead graphics API designed as a successor to OpenGL. While Vulkan is not natively supported on macOS, it can be used via MoltenVK, which translates Vulkan calls to Metal. This option requires significant integration work but offers the most long-term potential across platforms.
For a long-term solution, Vulkan appears to be the most promising path – essentially a modern, cross-platform successor to OpenGL, developed to overcome many of its limitations. Although not natively supported on Apple platforms, Vulkan’s compatibility through MoltenVK makes it a viable candidate for achieving performance and portability across environments.
While these options are worth exploring for long-term solutions, they may be unnecessarily complex for personal or educational use. However, the current efforts could prove valuable down the road by revealing key details, helping future work begin from well-understood points in the development process.
Vanessa has managed to run Croquet Jasmine without modifying the Smalltalk code by using the browser-based SqueakJS VM, with a custom OpenGL 1 implementation written in JavaScript. This was accessed via FFI and mapped to modern WebGL. The approach preserves the original graphics code inside the image while offloading rendering to the browser, and could serve as a model for similar efforts going forward.
Debugging and the Role of C in a Self-Hosting Environment
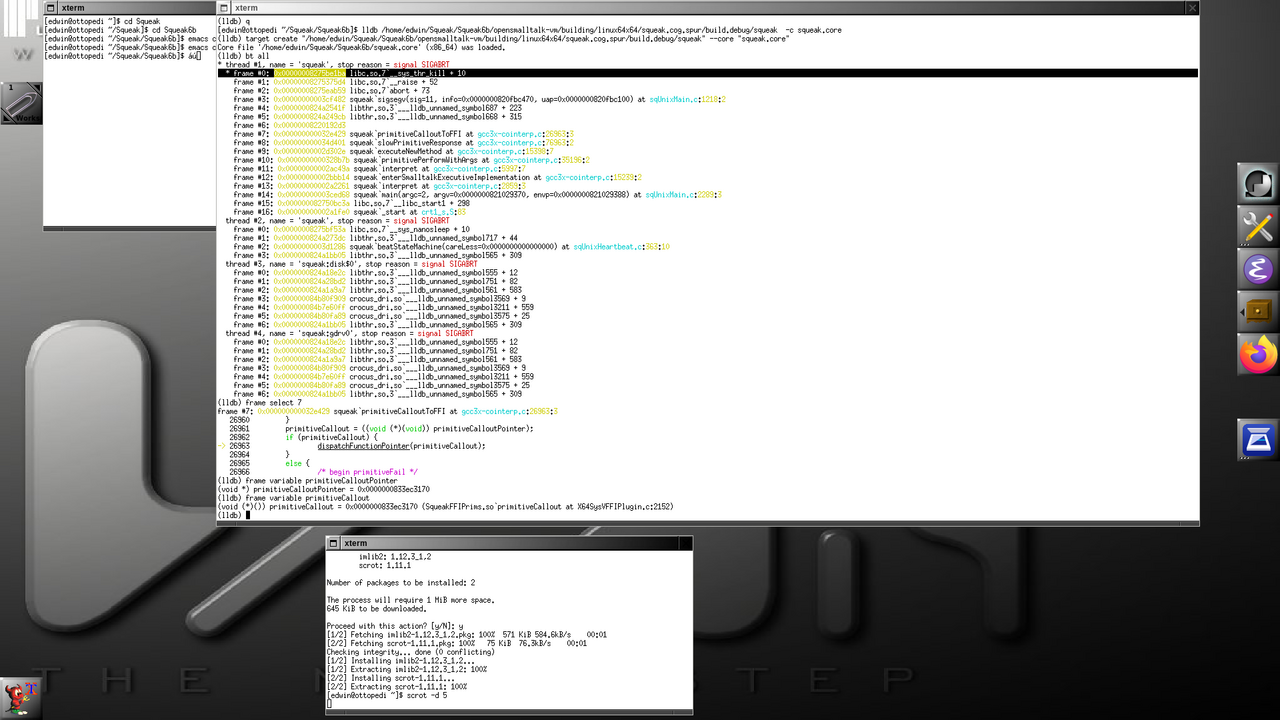
In efforts to get Croquet working with Squeak 6.0, contributors encountered challenges requiring low-level debugging. Their focus shifted to analyzing behavior via the debug VM, aiming to isolate root causes of instability or failure.
One may wonder why Squeak, being a self-hosting environment, might still require work in C. The environment is written in Smalltalk and is capable of building and evolving itself entirely from within. This self-hosting capability enables fast iteration, deep system visibility, and live modification of running code – all without leaving the environment.
However, Squeak runs on a virtual machine, with performance-critical parts written in a restricted subset of Smalltalk known as Slang (Swiki link). Slang is not a separate language, but a subset of Smalltalk designed to be translatable into C for compilation. This allows the virtual machine, which is largely written in Smalltalk, to be compiled into efficient native code for multiple platforms. When issues arise at the VM level – such as those involving primitives, foreign function interfaces, or memory management – developers must drop down into the generated C code to diagnose and resolve them. You can read more about the Squeak VM on the Swiki here and here.
The benefit of this design is excellent portability: the Smalltalk environment remains consistent across platforms, while only the VM layer needs to be recompiled or adapted for different operating systems or hardware. Having this level of separation allows the Squeak image to remain consistent across multiple platforms without exposing the underlying hardware implementation to the image code itself.
Further analysis suggested that inconsistencies between expected and actual behavior in the virtual machine’s handling of system-level function calls were at the heart of the issue – at least for now. By carefully tracing how external interfaces were being resolved and invoked, the contributors were able to isolate a likely point of failure. The realization was met with enthusiasm, signaling meaningful progress toward resolving the issue.
The Irony of Debugging and Systems Development
Edwin humorously remarked that he never expected working in Smalltalk would lead him back to debugging C code – a twist that underscores the unpredictable nature of systems development. Tim Rowledge added that, during his time at ParcPlace, it was an inside joke that those who got hooked on Smalltalk inevitably ended up spending too much time writing C, while the C++ fans who joined the team found themselves writing Smalltalk instead. The irony of this unexpected reality highlights the surprising paths developers take when working with complex systems.
Looking Ahead
We extend deep appreciation to Nikolay Suslov for his foundational work in bringing the original Open Croquet to Squeak 5.x, which has served as a solid base for moving toward compatibility with Squeak 6.0. A special thanks also goes to Edwin and Timothy for their time, dedication, and resourcefulness in troubleshooting and adapting Croquet to modern Squeak 6.0 systems. Their efforts contribute to the broader community by preserving an important piece of Squeak history and helping to lay the groundwork for future advancements.
The effort to bring Croquet to Squeak 6.0 is ongoing. We wish those involved continued success and invite anyone curious to jump in, contribute, and join the effort to keep Squeak a vibrant environment for innovation and exploration!
Have a great time with Smalltalk and keep on Squeaking!
Congratulations to the newly elected members of the Squeak Oversight Board for 2025. We are grateful to everyone who ran and offered their time in support of the community – it truly takes everyone’s contributions to help Squeak succeed. A big thank you as well to Patrick for once again running the election and handling the process so smoothly. Whether new to the board or continuing your service, we appreciate your dedication and look forward to a productive and exciting year ahead.
Below is Patrick’s official announcement to the Squeak Developers mailing list:
Hi Everyone,
I’m very pleased to announce your Squeak Oversight Board for 2025.
They are:
Marcel Taeumel
Vanessa Freudenberg
Eliot Miranda
Tim Rowledge
David T. Lewis
Christoph Thiede
Rachel Crowther
I would like to thank everyone that served on the board in the term of 2024. Thank you for your contributions to Squeak!
Thank you to everyone that ran this year and for everyone that voted. We are looking forward to a great year in the Squeak community!
Please help me to welcome and congratulate your new board for 2025!!
Dr. Nicola Mingotti has created a highly useful video tutorial, “The Squeak Smalltalk Help System”, where he demonstrates how to use and implement the Squeak Help System in your projects. In the video, Dr. Mingotti walks you through a step-by-step guide on creating documentation for your code, providing valuable insights into integrating the help system into your workflow. You can check out his video here.
Additionally, Dr. Mingotti offers supporting materials in his Swiki article here, which includes code snippets and further comments to aid your understanding.
Overview of the Squeak Help System
One of the many great features of Squeak is its rich set of help documentation. The default Squeak image comes with valuable documentation that covers topics such as: How to Use Squeak, How to Contribute to Squeak, Tutorials, The Terse Guide to Squeak, and Using WebClient and WebServer. This documentation is easily searchable, making it a highly useful resource for your projects.
Help System vs. Code Comments
It is important to note that the Squeak Help System is not intended to replace code comments. Squeak/Smalltalk provides excellent functionality for adding comments directly in your code, and these should remain the primary way to document code behavior, logic, and functionality. The Help System is designed for documentation outside the scope of code comments, such as explaining overall project goals, providing tutorials, or offering guidance on using tools and features in your project.
Features of the Help System
The help documentation system offers a variety of features, including text styling (bold, italics, strikethrough, underline), code formatting and syntax highlighting, and URLs, to name a few.
Additionally, you can add images to your documentation. This feature is currently available in the Trunk image, but you can implement it in other images as well by using its code as a reference. For the 6.0 image, you can perform a fileout of the SqueakHelpTextImage class from the Trunk image and then filein it into the 6.0 image. Alternatively, you can create your own code to implement this functionality! Thanks to Christoph Thiede for providing guidance on how he implemented this feature. You can find his post here.
How to Insert an Image into Your Help Page
Open a Workspace window.
In the Workspace, perform a “do it” on the following code: Clipboard clipboardText: Character startOfHeader asString.
In your help page window, move your cursor to the location where you want to insert the image. Paste the clipboard contents (Ctrl+v or Cmd+v on Mac). At this point, you won’t see anything yet.
(Optional) Skip this step if you prefer typing the code manually. Copy the following code, replacing /path/to/file/image.png with the actual path and filename of your image: SqueakHelpTextImage forForm: (ImageReadWriter formFromFileNamed: '/path/to/file/image.png')
Return to your help page window and move your cursor to the same location where you want to insert the image. PressAlt+5 (or Cmd+5 on Mac), then select “Custom attribute…” from the bottom of the list.
When the Input Requested box appears, paste the image code from Step 4 (or manually type it in) into the field labeled “Enter expression for text attribute:”. You should now see a shaded outline where the image will appear.
Save your changes by pressing Ctrl+s (or Cmd+s on Mac).
Your image is now successfully inserted into your help document!
Conclusion
A big thank you to Dr. Nicola Mingotti for his helpful video tutorial on using the Squeak Help System, which offers a step-by-step guide for integrating the help system into your workflow. His Swiki article is also a helpful resource with code snippets and additional comments. Be sure to check out his materials to further enhance your understanding of Squeak and the Help System!
Have a great time with Smalltalk and keep on Squeaking!
Ramon Leon has a new post on his On Smalltalk blog. In it, he describes how he chose a simple solution for a complex problem. Instead of relying on popular, complex systems, he built a straightforward, file-based job queue in Smalltalk, which has been running smoothly in his production systems for years. He also shares Smalltalk code he created to accomplish this goal, highlighting the effectiveness of simplicity in solving challenges.
Check out his latest post “Simple File-Based Distributed Job Queue in Smalltalk”here.
In this lesson, you will begin the process of creating your space shooter game by identifying and designing the key objects that will make up the gameplay. Having become familiar with the Squeak programming environment and basic concepts in previous lessons, it is now time to focus on the major components of the game. Understanding and determining these objects and their roles will lay the foundation for the game mechanics we will develop in upcoming lessons.
You will be building a simple, classic space shooter game. The game will feature a user-controlled ship that can shoot, enemy creatures that can be destroyed, and a score that accumulates points for each enemy destroyed. These are some of the primary objects you will work with, but as you proceed, you may discover additional objects or find that you need to adjust the roles and responsibilities of those you have already defined.
Object Roles and Responsibilities
When designing your objects, it helps to focus on two key aspects: what the object is and what it does – that is, its roles and responsibilities. For example, the spaceship object is something you control, and its responsibility is to move and shoot at enemies. Similarly, the enemy object is something that can be destroyed when hit by a shot. Other objects, like the score object, also play important roles in your game.
At this stage, you do not need to know all the objects you will need right away – this is perfectly fine! Object-oriented programming (OOP) is flexible, allowing you to modify your design as your game evolves. As you write more code, you might find that new objects are necessary, or some you initially considered may not be needed after all.
Key Questions to Guide Your Design
As you work through this process, consider the following questions to guide your object design:
How many objects can you identify in the example? Look closely at the example game screen provided in Figure 1 of Lesson 5. How many distinct elements can you identify that might need to be treated as objects? These could include characters like your ship, the enemies, a shot, or even the score. Everything you see has a purpose in the game. Take a moment to list them out and think about what each element represents.
What names would you choose for these objects? Think about what each object is and what it does. For example, if your game includes a spaceship, the object representing it might be called Ship. If there are enemies, you might have an object called Enemy. Choosing clear and descriptive names from the start will help your code stay organized and easier to understand.
How do these objects interact with each other? Once you have identified and named your objects, think about how they interact. How does your ship shoot at enemies? How do enemies react when hit? Considering these interactions early on will give you a clearer idea of how each object contributes to the overall functionality of your game.
Naming and Organizing Your Objects
An important part of designing objects is choosing meaningful names. The names you pick should make it clear what each object is and what it does in your game. At this stage, it is best to keep things clear and simple. For example, if you are designing the object that represents the player’s ship, use a name that clearly describes it, like Ship. Similarly, for enemies, choose a name that makes it obvious what the object represents.
For other objects, consider their role and responsibility. What would you call the object that represents something the player shoots? And what about the object that tracks the score? Remember, it is better to use simple, intuitive names that describe the object’s function rather than complicating things with complex names.
Do not worry if the names are not perfect at first. The most important thing is clarity. You can always refine them as your game evolves. In Squeak, renaming objects is easy, so you do not need to worry about getting everything right in the beginning.
Final Thoughts
In object-oriented programming, the process of designing and refining your objects is ongoing. You do not need to have all the objects figured out from the start, and it is okay if things are not perfect right away. The goal is to focus on understanding what each object does and how it interacts with others to create the overall game experience. Over time, you will continue to refine and expand your design.
Remember that in Smalltalk, making changes to your objects is simple – whether that involves adding new objects, renaming them, or adjusting how they behave. Do not be afraid to iterate and improve as you go along. It is all part of the learning process!
Good luck as you begin designing your space shooter game. Be sure to refer back to the example game screen shown in Figure 1 as well as the rest of Lesson 5 in the online lesson or the downloadable PDF as you proceed.
Lesson Resources
For Lesson 5 and the complete series of lessons on creating the Shooter Game, including all the necessary resources such as PDFs, source code, images, sound file, and more, visit https://scottgibson.site/ShooterGame/. This site provides everything you need to progress and also lets you play the game directly in your browser, seamlessly powered by SqueakJS. Whether you are just getting started with Squeak/Smalltalk or advancing your skills, these resources will help guide you as you move forward through the game development process.